Blog - Creating & Editing
On this page:
- The blog summary page
- Blog summary/feed layouts
- Creating a blog post
- Adding a post summary image
- Setting a featured blog post
- Categories & tags in each post
- Create categories & tags
- Changing the date of a blog post
- Creating a blog feed
- Using categories & tags in your blog feed
- Blog archive feature
- Blog author
- Default blog summary image
- Setting up blog comments
- Open Graph settings
Limecube provide a blog with all the features available as with any other page within the page editor. This allows you to complete customise your blog layouts with any kind of element Limecube has available. Best of all, it is all done within the same area as page creation to make everything seamless and easy to use.
The blog summary page
The blog summary page is your main blog page (except where your whole site is a blog) and the page that displays blog post previews for the blog posts within your site.
Understanding your blog summary page
By default, each site has a blog already setup by default and ready to go. Each time you add a new blog post, the post will automatically appear under the blog page, as a sub-page. As long as the blog post has been published, it will automatically display on the summary/feed that has been inserted into the summary page or anywhere else on your site.
| Layouts |
Layouts change how your blog summary or feed show on your page. Click each to see a live preview of the change. Some layouts will not display all the options below. |
| Categories filter | This setting controls the blog feed only containing posts from this category(s). Not usually used for your main blog page. |
| Tags filter | This setting controls the blog feed only containing posts from this tag(s). Not usually used for your main blog page. |
| Number of Posts | This controls how many posts will be displayed in this area. If this is on your main blog page, it is recommended to enable page numbers below, so your site visitors can navigate to blog posts past this number. |
| Excerpt length | The number of characters that will show in this feed. |
| Link text | This controls the anchor text for clicking through to read the full post.' |
| Description | This setting controls whether the description will show or not show in the feed. |
| Author | This pulls the Author full name from your profile page. |
| Date | Controls whether the date of the post will show in the feed. |
| Categories | Controls if the Category of the post will show in the feed. |
| Tags | Controls if the Tags for the post will show in the feed. |
| Page numbers | This turns on/off the option to have page numbers and previous/next under your blog posts for navigation. |
| Posts per row | This setting controls how many posts will show per row. When activated, it will resize the post preview to fit the number of posts required into the width of the section. |
| Width | You can control the width of posts by auto, which automatically changes the width of each post to fit the section, or fixed, which controls the exact width of the post. Often auto will provider a nicer design and fit better into the whole page. |
| Image Thumb | Horizontal layout only: Controls whether the image thumb will display in this area. |
| Post image width | Horizontal layout only: This sets the width for your image, and automatically adjusts the width of the description where applicable. |
| Post image height | This sets the height for your image. |
| Minimum width | Masonry layout only: This controls the minimum width of the blog post cards, as the cards' width is flexible. |
| Rounded corners | This gives the blog post image rounded corners. You can also adjust corners individually to give a more creative style to your images. |
| Blog spacing |
Blog spacing controls the space between posts. |
| Space around text | Controls padding to allow enough area for your text to breathe based on the settings above. |
Blog summary/feed layouts
To add a blog feed to a page:
- Click add element on the top admin bar
- Scroll down to the 'Blog summary/feed' element
- Drag it onto your page where you want it to display
Help Video
This help video shows you the basics of changing the blog summary layout.
Layout examples
Below are some examples of different layouts (not your only options) that can be achieved by playing around with the blog summary/feed settings.


Creating a blog post
This help video takes you through how to add a blog post. A blog post behaves almost the same as an other page in Limecube, and can contain any type of element you can use on any page in Limecube.
To add a new blog post:
- Open the pages panel and click 'Add new' at the bottom
- Click 'New blog post'
- Add your page name - this is usually your blog post title.
- Select the layout you want
- Click apply, and start entering content as you would on any newly added page
The exception being that blog posts can only reside under a Blog Summary page, and automatically insert date and author to the post.
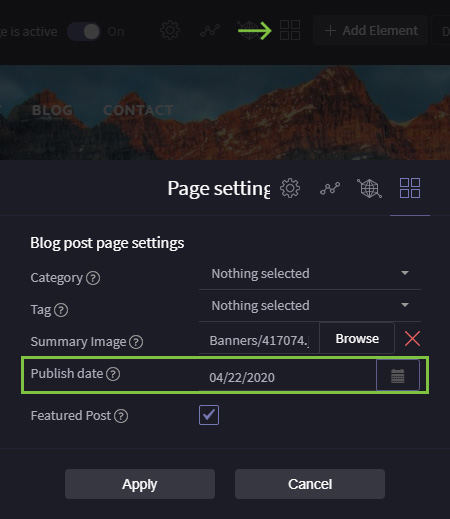
Adding a post summary image
To add a summary image to your blog post (as displayed in the blog feeds and summary page):
- opening up the blog settings and
- select the browse button next to 'Summary image' to choose the image you want displayed.
- click 'Apply'.
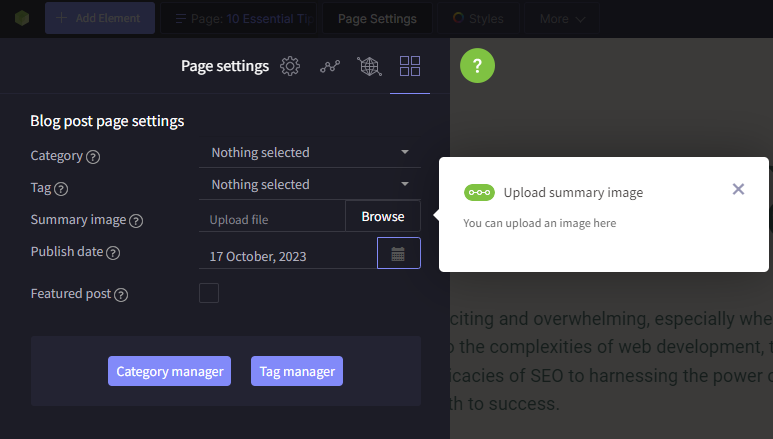
You can also update an image from the main blog summary page.
- Hover over your current image and look for the icon in the screenshot below.
- Click that icon, to open the settings shown in the step above.
![]()
Also, please take a look at this help video below.
Setting a featured blog post
A featured blog post is a blog post that pushes to the top of your blog summary page and feeds. Even when you add more recent posts, the featured post will always be first.
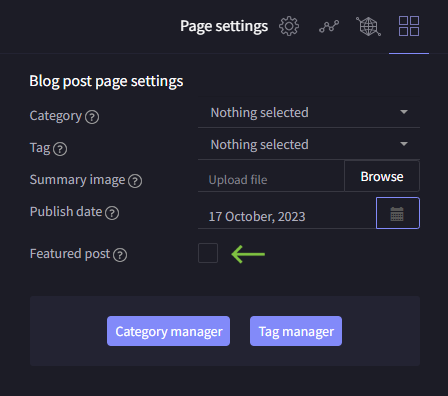
- Only 1 featured post can be set.
- When you have a featured post already set, ticking this on a new post, automatically de-selects the other featured checkbox.
- The video below shows a tiled layout blog summary page. In the tiled layout, the summary image is 4 times the size of a normal blog post.
- On other blog layouts, the featured post will stay in the same format as other posts, fixed to the top.
Default blog summary image
A default thumbnail image can be set for your blog posts. This is useful for when you do not upload an image thumb for the summary page view of each post. The default image will load automatically instead.
You can do this by going to:
Administration > Settings > Miscellaneous > Scroll down to 'Blog' and upload your image.
And press 'save all' after you have.
Help video
This help video below shows a featured blog post, and how to set it.
Your content goes here.
Click anywhere in this content area block or click the pencil icon in the top right to change this text.
Use this space to write or add any type of content (text, video or images) you wish, there is plenty of space to fill up. Tell your readers all about you and what you you are offering, it’s all up to you.
And importantly, don’t forget a call-to-action if you want the users to take extra steps.
Need to move this content?
Drag and drop onto any other area of the page where you see the editable area.
Links in content are disabled in admin view, so copy: https://support.limecube.co/content-blocks and paste to your browser to find out more about working with content blocks.
Categories & tags in each post
Categories and tags help combine news and blog posts into areas of interest for your audience. Categories and tags are displayed at the bottom of a blog post by default, and if your blog summary layout supports it, you'll often have these in a side column.
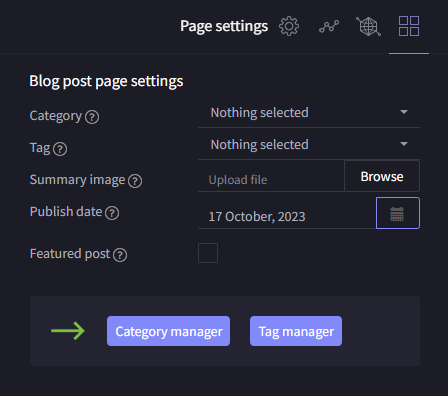
Categories and tags are set under your blog settings:
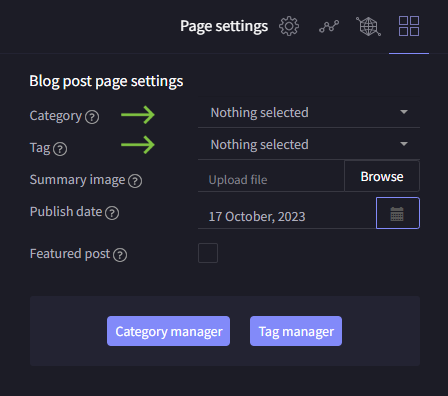
To add new categories and tags, click the relevant buttons:
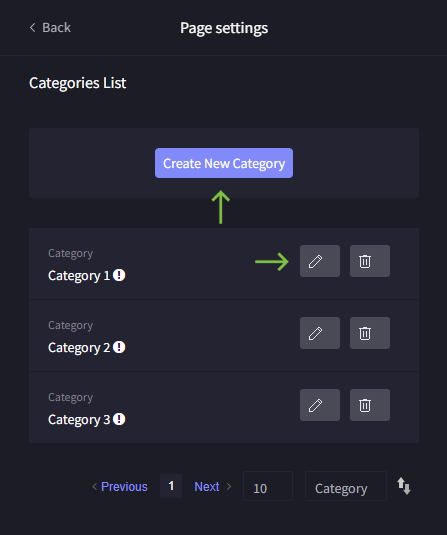
Click the button to create a new category.
You can also edit or delete from this view:
Fill out your necessary fields:
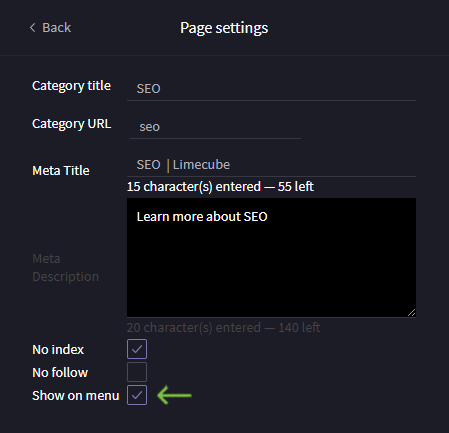
| Category title | The label for your category |
| Category URL | The page url to access your category on the front of your site |
| Meta Title | Used for SEO purposes |
| Meta Description | Used for SEO purposes |
| No index | It is recommended in most cases you keep this no indexed to avoid duplicate content issues. Google can still find each blog post through the main summary page. |
| No follow | This tells Google whether they can or cannot follow the links on this page. |
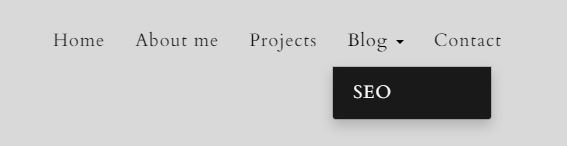
| Show on menu |
If this is selected, it will publish this category to your blog menu as a sub-page. The end result will look like this:
|
Help video - Setting categories and tags
This help video below shows you where to set tags and categories against each blog post.
Help Video - Create categories and tags
This help video shows you how to add categories and tags to your blog.
Creating a blog feed
This help video takes you through how to create and add a Blog feed to any page on your site, as well as control the feed layout.

Using Categories and Tags in your Blog Feed
The help videos below shows you how to use your blog feed to match tags and categories to the page they are on.
This is a very useful feature for times when specific types of blog posts match your page content providing your users with a richer user experience and blog posts only geared towards the service page content they are interested in.
For example, you may be a financial company offering:
- home loans
- debt consolidation loans
- personal loans
In your blog you have articles on all of these topics, as well as others such as a category for 'Choosing the right property'.
On the home loans services page, insert a blog feed, and in your blog feed categories, you could select the categories:
- Home loans
- Choosing the right property
The feed will now only display blog articles relating to these 2 categories, and no others.
Setting up blog comments
There are a few steps involved in getting your blog comments setup and active. While unfortunately it does require a little bit of work to get this going, your security is most important, and the way this has been setup is for security and to stop spammers. Unfortunately spammers love to target blog comments and without this protection, it can literally mean you have a thousand spam comments in a few hours.
The good news is you only need to set these up once.
Step 1
The first thing you need to do is setup Google reCaptcha under your settings. Google reCaptcha protects both website forms on your site as well as blog comments spam particularly from bots posting automatic comments..
Instructions for setting up Google reCaptcha can be found here.
Step 2
- Go to Blog settings: Top menu > More > Administration > Settings > Blog
- Scroll down to ‘Comments’ settings
- Click ‘Activate comments’
- Select Approval type (please note you can switch these at any time):
- Automatic: this is where a comment will automatically appear on the blog
- Admin required: this is where you will need to review a comment before it appears live
Step 3
Step 3 is setting up social login buttons. Click here to find out how.
Open Graph settings
Open Graph settings are important for blog posts being shared on social media.
To find out how to apply Open Graph settings to your blog post click here.
Can't find the answer you are looking for?
Try using searching below: