Google Reviews Full (GBP)
On this page:
This is the heavier version allowing you to display unlimited reviews.
This guide walks you through connecting your Google Business Profile (GBP) reviews to the Limecube Reviews widget. You’ll create one small Apps Script “proxy” in your own Google account, enable the right Google APIs, and paste three values into the widget.
This element is accessible by going to the Integrations element → Google Reviews - Full
What You’ll Need
- A Google account that manages the Google Business Profile you want reviews from.
- A Google Cloud project (free to create).
- A small Google Apps Script “proxy” you deploy once (we provide the code).
- The Integrations → Google
You will paste these into the Limecube Google Reviews element:
- Proxy Endpoint URL
- Google Business Account ID
- Google Business Location ID
Google Reviews (GBP) → Setup Guide
This guide walks you through connecting your Google Business Profile (GBP) reviews to the Limecube Reviews widget. You’ll create one small Apps Script “proxy” in your own Google account, enable the right Google APIs, and paste three values into the widget.
What You’ll Need
- A Google account that manages the Google Business Profile you want reviews from.
- A Google Cloud project (free to create).
- A small Google Apps Script “proxy” you deploy once (we provide the code).
You will paste these into the widget: (1) Proxy Endpoint URL, (2) Google Business Account ID, (3) Google Business Location ID.
Part 0 — Request access to the Google Business Profile (GBP) APIs
The GBP APIs are not enabled by default. You must submit an access request to Google and receive approval for your Google Cloud project before you can read reviews via the API.
What you need ready
- A Google account that manages (or is invited to manage) the Business Profile you want to read reviews from.
- A Google Cloud project to use with the APIs (you can create one later, but you will need the project number during the request).
- A short description of your use case (e.g. “Read public reviews for display on our website via a read-only widget”).
Find your Google Cloud Project number
- Open the Google Cloud Console: https://console.cloud.google.com/
- Choose your project from the top project selector.
- On the dashboard, look for the “Project info” card and copy the Project number (a numeric ID).
Submit the access request
- Open Google’s prerequisites page for the GBP APIs: Prerequisites — Business Profile APIs.
- In the “Request access to the APIs” section, click the link to the GBP API contact form and sign in if prompted.
- When the form asks what you need help with, choose Business Profile APIs, then select Application for Basic API access.
- Provide the details the form requests:
- Your Google Cloud Project number.
- Your contact email (the Google account you use for the project).
- Use case: "reading public reviews only (no write actions)".
- If asked about scopes, note that your integration is read-only and will operate within the standard
business.managescope.
- Submit the form.
After you submit
- Google reviews requests and approves access on a case-by-case basis. Allow a few business days.
- Approval will be tied to the project you listed. Keep that project number handy for the next steps.
- Once approved, continue with the next steps in this process.
Troubleshooting
- If you cannot see the contact form, make sure you are signed into a Google account and try an incognito window.
- If Google replies asking for clarification, respond to the case email with extra detail about your read-only reviews use case.
- Agencies or platforms managing multiple client profiles should state that clearly in the use-case description.
Part 1 — Create your Google Cloud project & enable the required APIs
- Create (or choose) a Google Cloud project
Open the “Create Project” page and give your project a name (for example, Limecube Reviews). Click Create.
If you already have a project, you can use it. In the top bar of Google Cloud, click the project name (the drop-down next to the Google Cloud logo) to pick your project. - Open the API Library
Go to the API Library homepage: console.cloud.google.com/apis/library.
Check the top bar shows your project’s name. If it doesn’t, click the project picker and switch to your project. - Enable the two Google Business Profile APIs
- In the Library search box, type Business Information API. Click it, then click Enable.
- Click Back to API Library, search for My Business Account Management API, click it, then click Enable.
- Confirm both APIs are enabled
Open your project’s Enabled APIs page: console.cloud.google.com/apis/enabled. You should see:- Business Information API
- My Business Account Management API
Troubleshooting
- “Failed to load” or a page error appears: open the Library home link above, make sure your project is selected in the top bar, then search the API name again.
- Still stuck? Try an incognito/private window, disable ad-blockers, or clear site data for
console.cloud.google.com.
Part 2 Configure OAuth (Consent Screen & Credentials)
All the points below happen from the left side bar in Google Cloud, starting from: https://console.cloud.google.com/apis/credentials/consent
1. Set up the OAuth consent screen:
https://console.cloud.google.com/apis/credentials/consent
- Go to https://console.cloud.google.com/apis/credentials
- Fill App name and Support email
- User type: External (or Internal for company Workspace users only).
- Contact Information - contact email.
- Scopes: add
https://www.googleapis.com/auth/business.manage. - Save (Testing mode is fine—add your Google account as a Test user).
2. Branding (configure for Production)
- Open Branding
- In the left sidebar, click Branding.
- App information (these fields should already be filled out from the previous step)
- App name
- User support email
- Developer contact information
- App logo
- Click Upload and add a square PNG/JPG (≤ 1 MB; 120×120 px or larger).
- This appears on the consent screen.
- Authorised domains (required for Production)
- Click Add domain and enter your website’s root domain (e.g. yourdomain.com).
- If Google asks you to verify ownership, complete the prompt (HTML file via Search Console or TXT record via your domain).
- When verification is done, return to Branding → Authorised domains, add the same domain, and Save.
- App domain links (must use your authorised domain)
- Application home page: e.g. https://yourdomain.com/
- Application privacy policy link: e.g. https://yourdomain.com/privacy-policy/
- Application terms of service link: e.g. https://yourdomain.com/terms/
- All three URLs must live on the domain you added under Authorised domains.
- Save
- Scroll to the bottom and click Save.
- If you see a warning about domains, add/verify the domain (Step 4) and save again.
3. Audience - Move on to Production
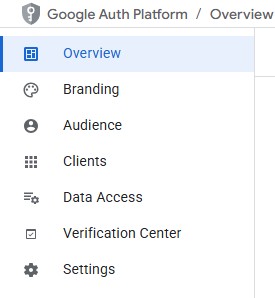
- Open Audience
- In the left sidebar, click Audience
- Make sure User type = External,
- Then click 'Publish app', to publish to live/production (Google may ask for app verification because the Business Profile scope is sensitive).
If verification is requested, ensure the logo, authorised domain, home page, privacy policy, terms, and support email are all set as above, then follow Google’s prompts.
4. Data Access
- Open Data Access
- In the left sidebar: Click Data access.
- Click the 'Add or remove scopes' button.
- In the right side panel that slides open:
- Under 'Manually add scopes' paste in:
https://www.googleapis.com/auth/business.manageand click 'Add to table'. That will add it to the table above and have it pre-selected.
- Under 'Manually add scopes' paste in:
- Click Update
5. Create the OAuth Client ID in Google Cloud
Step A — Create the Apps Script project (to obtain your Script ID)
Open a new tab (leave the Google Cloud tab open)
- Open script.google.com and click New project.
- Click the project name at the top left and rename it (e.g. GBP Reviews Proxy).
- Paste in the full “Google Reviews Proxy” code from this file: gbp-reviews.
- Click Project settings (left sidebar, cog icon).
- Copy the value labelled Script ID (it's a long string of characters). Keep this handy.
Step B — Create the OAuth Client ID in Google Cloud
Return back to your Google Cloud tab.
- Open Clients
- Click Create client → OAuth client ID.
- Set Application type to Web application.
- Set Application type to Web application.
- Name: e.g. GBP Reviews – Apps Script.
- Leave Authorized JavaScript origins empty.
- Under Authorized redirect URIs, click Add URI and paste:
https://script.google.com/macros/d/SCRIPT_ID/usercallback
ReplaceSCRIPT_IDwith the Script ID you copied in Step A. - Click Create. Copy both values shown: Client ID and Client secret.
Tip: If you later see a redirect_uri_mismatch error, it means the URI above doesn’t exactly match the one saved on the OAuth client. Edit the client and fix the URI.
Step C — Link the Apps Script to the same Cloud project
- In the Cloud Console, go to Home (Dashboard). Copy the Project number.
- Return to Apps Script → Project settings → in Google Cloud Platform (GCP) Project click Change project.
- Paste the Project number and click Set project.
Step D — Add your Client ID & Secret into Apps Script
- In Apps Script, open Project settings → Script properties → Add property.
- Add these two properties exactly (names are case-sensitive):
OAUTH_CLIENT_IDin the first 'Property field → and paste your Client ID into the 'value field'.OAUTH_CLIENT_SECRETin the first 'Property field → and paste your Client secret into the 'value field'. - Click Save.
Step E — Deploy and authorise the web app
- Click Deploy → New deployment.
- Choose Web app as the deployment type (Select type → little cog icon).
- Execute as: Me (your Google account).
- Who has access: choose according to your Limecube integration (commonly 'Anyone').
- Click Deploy, then click 'Authorize access' and follow the prompts. You should authorise access with the same email used to access the Google Cloud setup.
- This completes the connection.
Troubleshooting
- If you land on a blank or “Failed to load” screen, open Auth Overview, confirm the correct project in the top bar, then navigate to Branding, Audience or Data access again.
- Use an incognito window if the console appears stuck or cached.
- Ensure the Google account you’ll use with Apps Script is added as a Test user while the app is in Testing.
Part 3 — Find Your Account ID & Location ID
The friendliest way is Google’s OAuth 2.0 Playground.
- Open Playground
https://developers.google.com/oauthplayground - Click the settings gear in the top right, and tick Use your own OAuth credentials.
- Paste the same Client ID & secret from Part 2. Close (these settings will save automatically).
- Step 1: Authorise the scope
Copy this url below:
And paste into the field next to the 'Authorize APIs' button.https://www.googleapis.com/auth/business.manage
Click Authorize APIs and allow the prompts. - Step 2: Exchange authorisation code (Playground does this automatically).
- Step 3: Send these requests:
- List Accounts (copy the numeric accountId):
GET https://mybusinessbusinessinformation.googleapis.com/v1/accounts - List Locations for that account (copy the numeric ID from each
namelikelocations/123...):GET https://mybusinessbusinessinformation.googleapis.com/v1/accounts/ACCOUNT_ID/locations?pageSize=100&readMask=name,title
- List Accounts (copy the numeric accountId):
You now have: Account ID and Location ID.
Part 4 — Fill the Limecube Widget Fields
Minimum Star Rating
- Show only reviews with this star rating or higher.
- Default: 4 (only show 4★+).
Maximum Number of Reviews
- The maximum number of Google reviews to load and display from your connected account.
- Default: 50.
Scroll Speed (pixels per second)
- Controls how fast the reviews scroll across the screen. Higher values scroll faster.
- Default: 60 (higher = faster).
Hover Slowdown Factor
- This makes the speed of the auto-scrolling slow down for people wanting to read a bit longer while hovering over the card.
- Default: 0.35 (35% of normal speed on hover).
Proxy Endpoint URL
- Enter the full URL of your Google Apps Script or proxy endpoint that connects to the Google Reviews API.
- Paste your Apps Script Web app URL (ends with
/exec).
Google Business Account ID
- Your Google Business Profile Account ID. This identifies your GBP account for fetching reviews.
- Paste the numeric ID from the “List Accounts” response.
Google Business Location ID
- Your specific location ID from Google Business Profile where the reviews are sourced.
- Paste the numeric part of the
name(e.g., fromlocations/6723368497723051295paste6723368497723051295).
Date Format
- Default: dd/MM/yyyy. Examples:
dd/MM/yyyy→ 12/05/2025,MMM dd, yyyy→ May 12, 2025.
Quick Test & Troubleshooting
How to test your setup is working (and what success looks like)
- In your Apps Script project, open Deployments → select your Web app deployment → copy the Web app URL shown there.
- Open a new private/incognito browser window.
- Visit your Web app URL with test parameters appended:
<YOUR_WEB_APP_URL>?action=listReviews&accountId=<ACCOUNT_ID>&locationId=<LOCATION_ID>&max=3 - Success looks like:
- A JSON or JSONP response that contains a
reviewsarray. Example:{ "reviews": [ { "rating": 5, "comment": "Great!", "updateTime": "2024-11-10T03:12:45Z", ... }, { "rating": 4, "comment": "Very good", ... } ] } - If the array is empty but the JSON structure is valid (no error message), your proxy is working. Check your IDs and rating filters if you expected reviews.
- A JSON or JSONP response that contains a
Common results and how to fix them
“Authorization is required” page, or HTTP 401/403
“Authorization is required” page, or HTTP 401/403
- Open the Web app URL (without any query parameters) in a regular browser tab.
- Complete the Google OAuth consent flow and click Allow.
- Ensure your OAuth consent screen includes the scope
https://www.googleapis.com/auth/business.manage. - If your consent screen is in Testing mode, add your Google account under Test users and repeat the test.
“Invalid redirect URI” during Google sign-in/consent
“Invalid redirect URI” during Google sign-in/consent
This appears while completing the OAuth consent. Fix by aligning the OAuth client’s redirect URI with your Apps Script project.
- In Apps Script, go to Project settings and copy the Script ID.
- In Google Cloud Console, open APIs & Services → Credentials and select your OAuth 2.0 Client ID (the one you created for the web app).
- Under Authorized redirect URIs, add:
https://script.google.com/macros/d/<SCRIPT_ID>/usercallback - Save, then retry the consent flow.
“CORS has been blocked” error in the browser console
“CORS has been blocked” error in the browser console
Open DevTools (F12) and check the Console for CORS messages. The Limecube widget uses JSONP to avoid CORS, so you should not see this if your deployment is correct.
- In Apps Script → Deployments, edit the Web app and set Who has access to Anyone.
- Confirm your widget requests include a
callbackparameter (JSONP). Example:<YOUR_WEB_APP_URL>?action=listReviews&accountId=...&locationId=...&max=3&callback=cb123 - Retest your proxy URL as above.
Empty reviews array (no errors)
Empty reviews array (no errors)
- Confirm you’re using the correct Account ID and Location ID (from the Business Profile APIs).
- Reduce filters (e.g., lower Min rating) and increase Max reviews.
- Verify the Location actually has public reviews.
HTTP 404 or TypeError from Apps Script
HTTP 404 or TypeError from Apps Script
- Ensure you pasted the full script, saved it, and created a Web app deployment (not just a test execution).
- If a line number is shown, recheck that line in your code for typos in
ContentServiceor response handling.
HTTP 429 or intermittent timeouts
HTTP 429 or intermittent timeouts
- Wait and try again (temporary rate limiting or network delay).
- Reduce Max reviews in the test query while validating.
Can't find the answer you are looking for?
Try using searching below: